
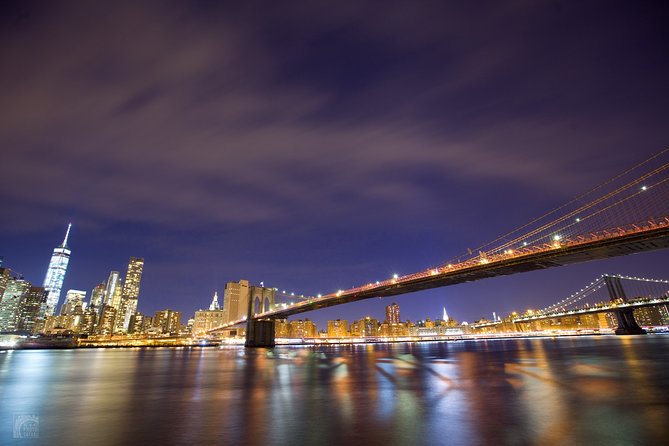
Review · NIGHT & ASTRO PHOTOGRAPHY
Brooklyn Bridge at Night Photography Tour
New York looks different after dark, and this tour puts you in the right places to photograph it. You’ll work from the Brooklyn Bridge itself, then finish with views of the Manhattan Bridge from Brooklyn Bridge Park. The small group, capped at six, allows for real help instead of a quick explanation before the guide moves on.
I especially like the one-on-one camera coaching and the chance to work on useful night techniques such as bracketing and bulb mode. I also like that the tour mixes photography with local stories, including the Woolworth Building’s role in New York’s building boom. The main drawback is the price: at $150 for about 110 minutes, it makes the most sense if you want instruction, not just a nighttime walk.
Key points to know before you book
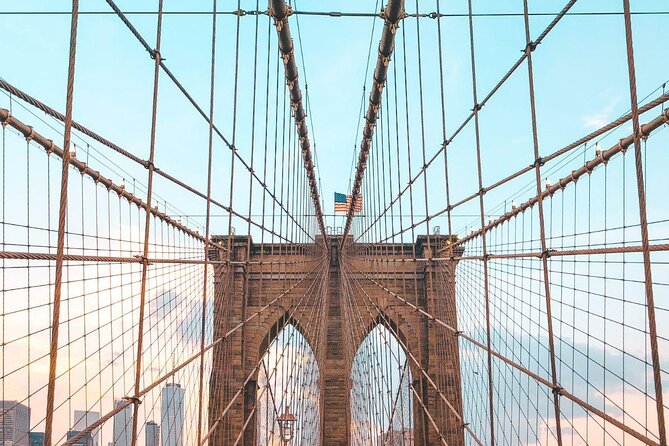
- A six-person maximum keeps the instruction personal, with time for help on camera settings and composition.
- The Brooklyn Bridge is your main shooting platform, giving you views of both the bridge structure and the Manhattan skyline.
- Brooklyn Bridge Park adds a second viewpoint, where you photograph the Manhattan Bridge from below and across the river area.
- Night photography skills are part of the lesson, including exposure checks, bracketing, and bulb mode.
- Zim is a frequently named guide, praised for clear instruction, creative compositions, and comfort with different cameras.
- The tour starts at 8:30 pm and depends on good weather, so plan your evening and clothing accordingly.
Why this short night walk is really a photography class
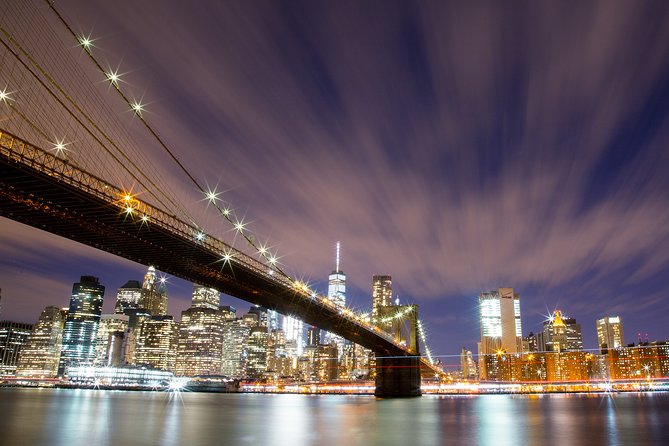
The Brooklyn Bridge at Night Photography Tour is best understood as a working photo lesson with a famous New York setting. The bridge and skyline provide the subject, but the real product is guidance from a professional photographer.
That distinction matters. You can walk across the Brooklyn Bridge on your own for free, and you can take skyline pictures from the waterfront without paying for a tour. The $150 fee is aimed at helping you make better images while you are there.
You’ll have about 1 hour and 30 minutes focused on the Brooklyn Bridge before spending roughly 20 minutes at Brooklyn Bridge Park photographing the Manhattan Bridge. That is not a long evening, so the route stays focused. You are not signing up for a broad city tour with many unrelated stops.
The group limit of six is one of the strongest features. Night photography often requires small adjustments to shutter speed, aperture, ISO, focus, and composition. If six people are sharing one instructor, you have a reasonable chance to ask for help and receive an answer suited to your camera and skill level.
More Photography Tours in the USA
- From Waikiki: Best of Oahu Photo Tour with Pickup
★ 4.9 · 274 reviews - The Ultimate LA and Hollywood Photo Tour
★ 5.0 · 233 reviews - Beautiful Colors of Hawaii Photo Tour
★ 5.0 · 165 reviews
Meeting near Jay Street and starting at 8:30 pm
The meeting point is Wholesome Farms Market at 108 Jay Street in Brooklyn. The tour begins at 8:30 pm and returns to the same meeting point.
You need to arrange your own way there and back. Hotel pickup, drop-off, and transportation between attractions are not included. The location is near public transportation, and the provided directions note access from Grand Central Terminal or Metro-North by taking the downtown 4, 5, or 6 train and then transferring to the A train.
Give yourself time to find the meeting point. A photography lesson works better when you arrive ready to shoot rather than hurrying in at the last moment. The mobile ticket is convenient, but you should still have the meeting address and start time easy to reach on your phone.
The 8:30 pm start gives you a proper night setting rather than an evening session with only a few lights visible. That is useful for long exposures and for studying how bridge lighting, office windows, traffic, and reflections affect an image.
Because the tour requires good weather, a poor forecast can change your plans. If the operator cancels for weather, you are offered another date or a full refund. You can also cancel for a full refund up to 24 hours before the start time. Less than 24 hours before the tour, refunds and changes are not accepted.
Photographing the Brooklyn Bridge from the bridge itself
The first and longest part of the experience takes place on the Brooklyn Bridge. You photograph the bridge while standing on it, which gives you a close view of its stone towers, suspension cables, walkway, and illuminated structure.
This is more useful than simply stopping at a single overlook. A bridge offers lines that lead through the frame, repeated cables, strong geometric shapes, and a dramatic sense of depth. Your guide can help you decide how much of the bridge to include and how to balance it against the city behind it.
The bridge also gives you views toward Lower Manhattan and Midtown. Depending on your angle, you can work with the World Trade Center, Empire State Building, Chrysler Building, Brooklyn, and the riverfront area. These landmarks do not all need to appear in one picture. In fact, the strongest composition may use only one or two.
This is where the group format matters most. You may need help checking if the bright skyline has lost detail, or if the bridge lights are too strong for your chosen exposure. The guide can also suggest a different position or angle when your first composition feels ordinary.
A useful part of the instruction is learning to think beyond the obvious postcard view. The bridge is famous, so a straight-on picture can look familiar. Creative framing, unusual angles, and careful use of the cables can make your image feel more personal.
The walking portion also has a practical limit. The Brooklyn Bridge is an active public walkway, not a closed photography studio. You will need to share the space with other people, and you should be prepared to keep your equipment organized. The tour details say most people can participate, and service animals are allowed, but you should still consider your comfort with an evening walk and changing viewpoints.
Reading the skyline from Lower Manhattan to Midtown
The skyline lesson gives the bridge more meaning than a simple list of famous buildings. From this part of the route, you can photograph the World Trade Center, Empire State Building, Chrysler Building, and Brooklyn.
The Empire State Building is one of the easiest landmarks to recognize from the bridge. It can work as a bright vertical focal point, especially when the rest of the frame contains darker buildings. The World Trade Center gives you a newer anchor in the view, while the Chrysler Building adds a distinctive shape farther uptown.
The guide also adds bits of city history while you work. One useful correction concerns New York’s building boom: it was the Woolworth Building, not the Empire State Building, that helped set off that burst of skyscraper construction. Details like this make the skyline easier to read, especially if you are seeing these buildings for the first time.
I like this combination of practical photography and short local context. You do not need a full architecture lecture, but knowing what you are looking at can help you choose a subject. A skyline picture becomes more interesting when you understand why a building matters.
Same backdrop, a different kind of shoot:
- The ‘OG’ Manatee Snorkel Tour with In-Water Guide/Photographer
★ 5.0 · 2,539 reviews - Manatee Swim Tour with In Water Photographer
★ 5.0 · 2,300 reviews - Guided Small Group Manatee Snorkeling Tour with In-Water Photographer
★ 5.0 · 1,336 reviews - LA: Hollywood Sign Tour with Comedians, Dogs, & Epic Photos
★ 4.9 · 1,193 reviews
Learning exposure, bracketing, and bulb mode
Night photography can look simple from the outside. Point your camera at the lights, press the button, and hope for the best. In practice, bright buildings and dark water create tricky exposure problems.
The lesson covers the basics of night photography and lets you test them on real scenes. You can work on exposure settings while comparing the results on your camera screen. The instruction is not limited to general advice. The guide checks exposure and composition and offers camera-specific suggestions.
Bracketing is particularly useful when a scene contains a wide range of brightness. You take several exposures at different settings, which gives you more options later. You do not need to master every possible use of bracketing during a 110-minute walk, but learning when and why to try it can make the lesson worthwhile.
Bulb mode is another technique specifically associated with the tour experience. It allows longer exposures than the camera’s usual timed settings, which can help when the scene is very dark. You need to handle this carefully, since movement during a long exposure can soften the image.
The aim is not to turn you into a night-photography specialist in one evening. The value is that you leave with techniques you can practice on your own. If you already understand basic exposure, the guide can help you use these tools with more confidence. If you are new to manual settings, expect to spend part of the tour learning camera controls rather than producing a perfect image at every stop.
Brooklyn Bridge Park and the Manhattan Bridge finale
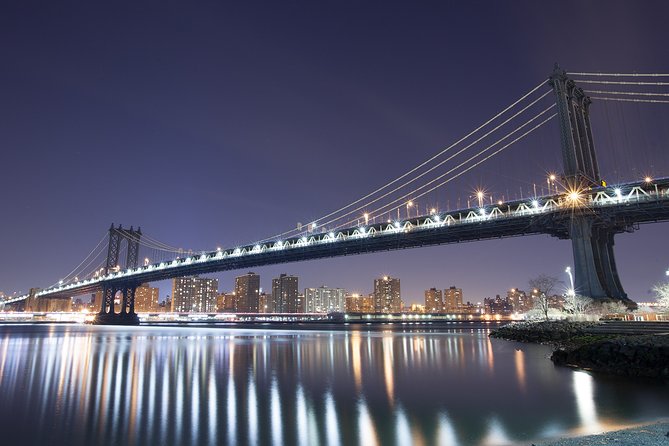
The final stop is Brooklyn Bridge Park, where you photograph the Manhattan Bridge from a different position. After working on the Brooklyn Bridge itself, this change of viewpoint helps you compare how distance, framing, and surrounding buildings affect the picture.
You have about 20 minutes here, so this is a shorter section of the tour. It is enough time to try several compositions, but not enough for a slow waterfront stroll or a long technical workshop. Keep your camera ready and listen for the guide’s suggestions as you move into position.
The Manhattan Bridge gives you a different subject from the Brooklyn Bridge. Its structure and suspension lines create another set of patterns, and the park gives you room to place the bridge within the wider Brooklyn and riverfront setting.
This last stop also gives the evening a satisfying visual contrast. You begin on the Brooklyn Bridge, looking outward toward the city, then finish by photographing another bridge from Brooklyn Bridge Park. You are not simply repeating the same picture twice.
How much help can you expect from the guide?
The guide is a professional photographer, and Zim is the name most closely associated with this particular experience. She is described as clear, punctual, personable, and comfortable explaining both advanced techniques and basic camera-specific settings.
That range is important. A photography group can include someone using a camera manually for years and someone still learning how shutter speed affects a picture. The tour is likely to work best when you tell the guide what you want to learn at the beginning.
Zim’s teaching approach includes checking exposures, reviewing compositions, and encouraging different ways to look at a scene. That is more useful than simply being led to a famous viewpoint and told to take pictures.
You may also receive support from the wider New York City Photo Safari team. Mike has helped with a small issue over the phone, which suggests that basic booking or technical problems do not necessarily end when the walking portion begins. Still, the main value comes from the guide with you in the street.
Do not expect a private lesson at this price. The group can include up to six people, and the guide must divide attention. The small size reduces that problem, but it does not remove it.
Is $150 good value for 110 minutes?
The $150 price is high if you only want access to the views. The Brooklyn Bridge, Brooklyn Bridge Park, and their skyline outlooks are free, and you can walk the route without paying an admission fee.
The value changes if you want to improve your photography. You are paying for a professional photographer, a planned route, instruction in night techniques, and a small group. If the guide helps you understand settings that have confused you, the lesson can continue paying off after the evening ends.
I would consider the price fair for a serious beginner, an enthusiast who wants to improve night images, or someone who has a camera but rarely uses manual controls. It is less attractive for someone who wants a casual sightseeing walk or already has strong night-photography skills and only needs a viewpoint.
The tour does not include transportation, hotel pickup, or drop-off. It also does not state that equipment is supplied, so you should not book assuming you will receive a camera or tripod. The practical value is in the instruction and locations, not in included gear.
Who should book this Brooklyn Bridge photo tour?
This experience suits you if you want to learn by making pictures on location. You do not need to be a professional, and the instruction can be useful at different skill levels.
It is also a good fit for locals. You may know the bridges well but still see them differently when a photographer asks you to change your angle, check your exposure, or use the city lights as part of the composition.
Families can participate, but children must be accompanied by an adult. Most people can take part, and service animals are allowed. You should be comfortable with an evening walking activity and with working around a public bridge and park.
The tour is not the best choice if you dislike fixed meeting times, want a long sightseeing program, or need a fully private lesson. At only 1 hour and 50 minutes, it is focused and fairly brisk.
Should you book the Brooklyn Bridge at Night Photography Tour?
Book it if you want more than a postcard. The combination of a six-person maximum, a professional photographer, and real practice with night settings gives the $150 fee a clear purpose.
I would be especially interested if Zim is your guide, since her instruction covers composition, exposure checks, camera-specific tips, bracketing, and bulb mode. You should still confirm the guide if that matters to your booking, since the available information does not promise a particular instructor every time.
Skip it if your main goal is simply to see the Brooklyn Bridge after dark. You can do that independently for free. But if you want to return home with better habits, stronger compositions, and a clearer understanding of night photography, this is a focused way to use one New York evening.
FAQ
How long does the Brooklyn Bridge at Night Photography Tour last?
The tour lasts approximately 1 hour and 50 minutes. About 1 hour and 30 minutes is spent at the Brooklyn Bridge, followed by about 20 minutes at Brooklyn Bridge Park photographing the Manhattan Bridge.
Where does the tour begin and end?
The meeting point is Wholesome Farms Market at 108 Jay Street, Brooklyn, New York 11201. The activity ends back at the same meeting point.
What time does the tour start?
The tour starts at 8:30 pm.
How many people can join the tour?
The maximum group size is six people. This small-group format is intended to provide personal photography instruction and guidance.
Is transportation included?
No. Hotel pickup and drop-off are not included, and you are responsible for transportation to and from the attractions. The meeting area is near public transportation.
What happens if the weather is poor?
The activity requires good weather. If the operator cancels because of poor conditions, you can choose another date or receive a full refund. You can also cancel up to 24 hours before the start time for a full refund.
More Evening Trips around the USA
- Sunset Hike and Photography Tour near Red Rock with Optional 7 Magic Mountains
★ 5.0 · 149 reviews - Sunset Hike and Photography Adventure in South Lake Tahoe
★ 5.0 · 74 reviews - Las Vegas: Sunset Hike and Photography Tour Near Red Rock
★ 4.7 · 67 reviews - Private San Francisco Sunset Photography Experience
★ 5.0 · 33 reviews
More Night and Astro Photography in the USA
- Mauna Kea Stargazing Experience + Photos
★ 5.0 · 261 reviews - Private Guided Night Photography Tours on Cape Cod (for one photographer.)
★ 5.0 · 38 reviews - Moab: The Windows Astro-Photography and Stargazing Hike
★ 4.8 · 36 reviews - Milky Way Photography Workshop in Acadia National Park
★ 5.0 · 8 reviews
Just added around the USA
- Focus on Haines Private Nature / Photography tour★ 5.0 · 38 reviews
- Exclusive Photography Tour Haines Departure★ 5.0 · 19 reviews
- Private Proposal Professional Photo Shoot – Grand Canyon★ 4.5 · 2 reviews
- Hire Photographer, Professional Photo shoot – Grand Canyon★ 5.0 · 29 reviews
- Photoshoot in Grand Canyon★ 5.0 · 2 reviews
- Full Day Guided Wildlife Photography Tour In Yellowstone★ 5.0 · 6 reviews
- Miami incredible Photoshoot – Private Session with a Professional Photographer★ 5.0 · 2 reviews
- Modern Vibe Fort Lauderdale Las Olas Photography Session★ 5.0 · 2 reviews
Night & Astro Photography, side by side.
Tokyo by Night Photography Tour (Private Option Available)
Read our review →
Night Photo Session in a Fiat 500 with Aperol Spritz
Read our review →
Private Guided Night Photography Tours on Cape Cod (for one photographer.)
Read our review →
Moab: The Windows Astro-Photography and Stargazing Hike
Read our review →Lists this one turns up in